Limit the maximum number of transfers
Note: These features are part of the Visforms Subscription and are not included in the free Visforms version.
System Settings - Activate plugin in plugin manager
Note: Please make sure you have installed your Visforms Subscription.
You must then activate the plugin in the plugin manager before you can use it.
To do this, go to the “System” menu item in the administration of your Joomla installation and then to the “Plugins” entry on the “Manage” tile. Locate the plugin’s entry named “Visforms - Limit transfers”. To do this, use the search filter above the plugin list.
The plugin is activated when you see a green tick in the status column. It’s disabled when there’s a gray circle with a white X in its place. In this case, click once on the gray circle to activate the plugin.
Configure the maximum number
Note: All options for the maximum transfers are set in the form configuration.
The “Visforms - Limit Submission Count” plugin was developed in such a way that you can configure the Submission Count options separately for each form. For this purpose, the plugin creates a new tab “Maximum transmission” in the form configuration.
So please go to Components » Visforms in the administration of your website and open the edit view for the form for which you want to limit the maximum number of submissions. From there, click on the “Maximum Transfer” tab.
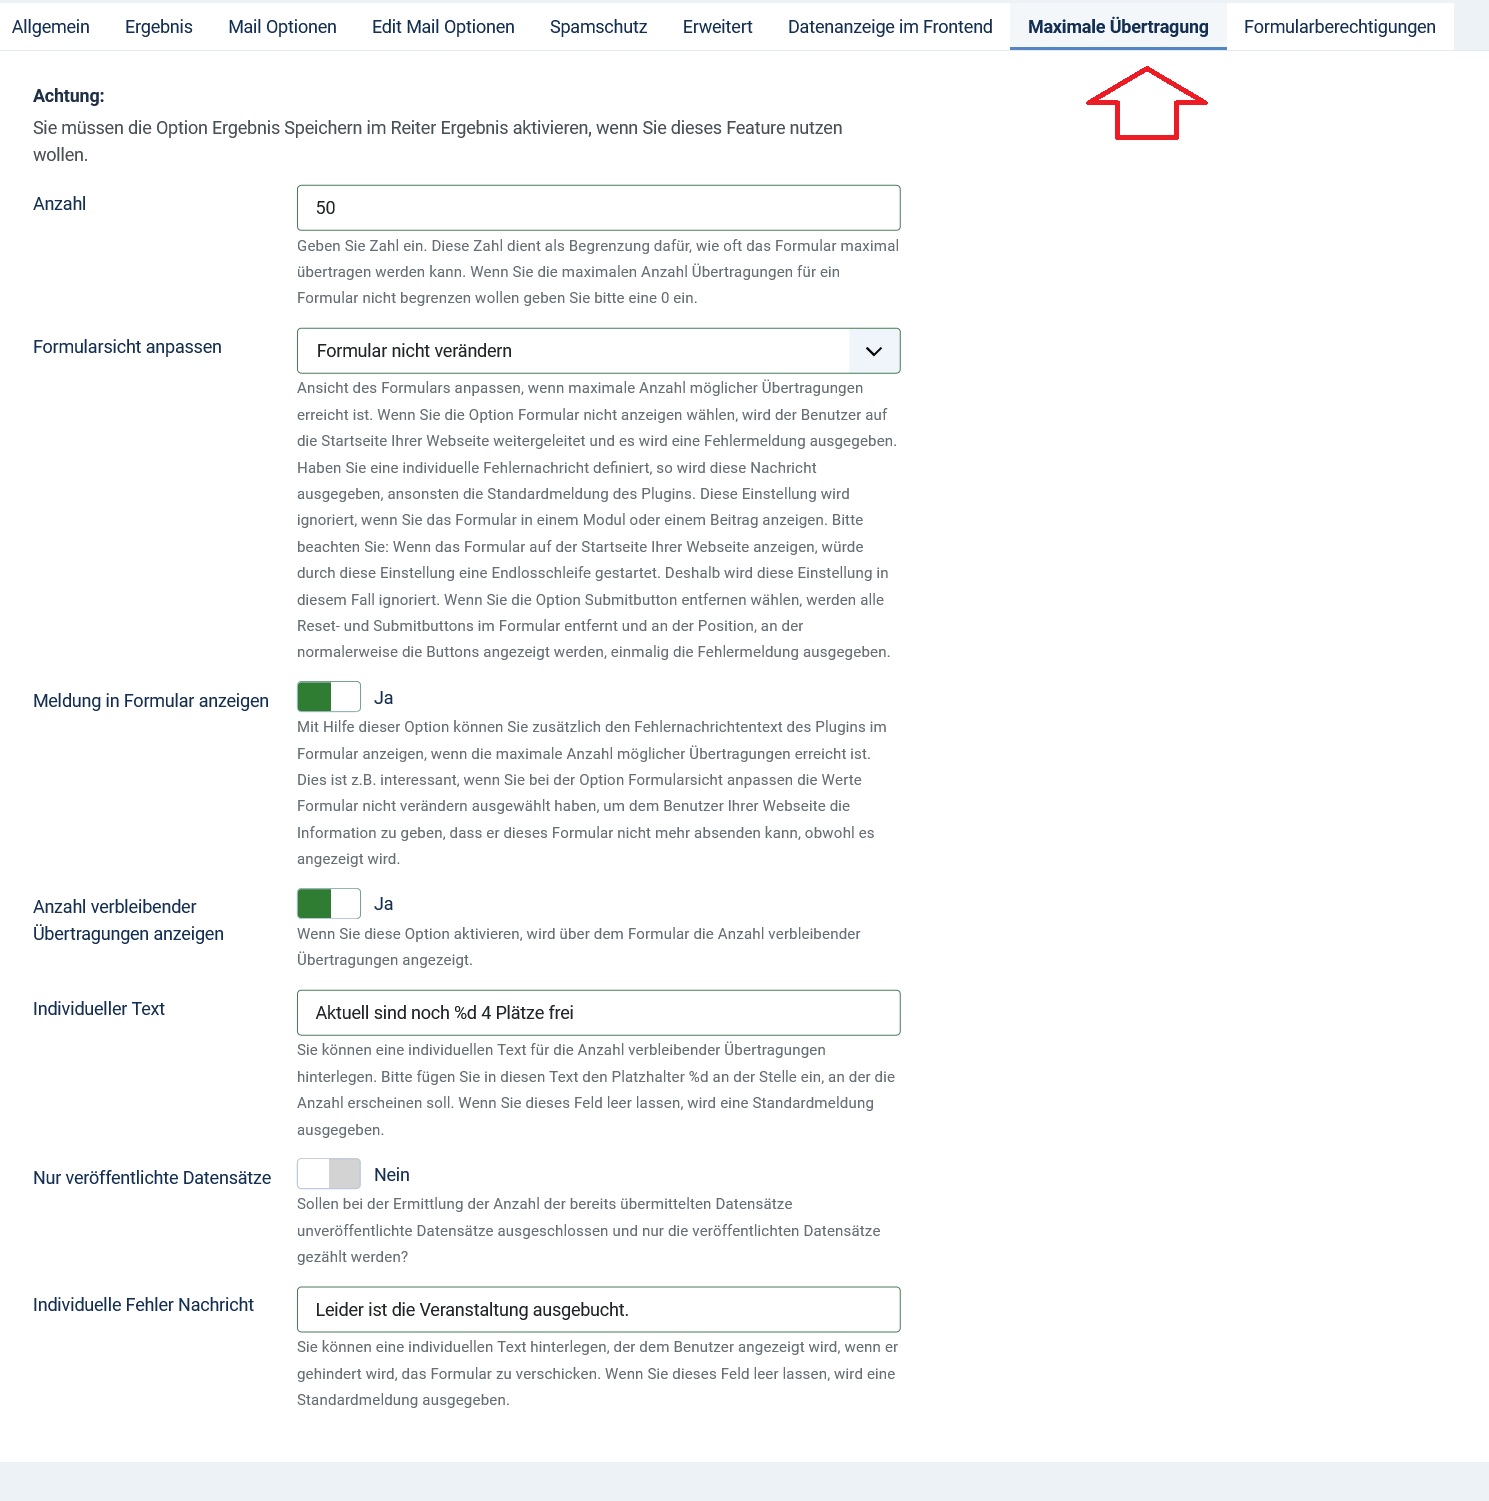
Set maximum number
In the Count option, enter a number that represents the maximum number of times the form can be submitted. Set the value to 0 if you don’t want to limit the number and the form can be submitted any number of times. The value 0 is the default setting of the option.
Which existing transmissions should be considered?
Visforms gives you the option to “publish” or “not publish” submitted form data. This option affects whether the data is then displayed in the data views in the frontend or not.
In connection with an event registration, it is often the case that only the published data records correspond to valid registrations. All unpublished data sets should therefore not be taken into account when determining the actually valid registrations.
The “Limit the maximum number of transfers” plugin therefore offers you the option “Only published data records”. This allows you to decide whether unpublished data records should be taken into account when determining the number of data records already submitted.
The error message:
By default, the plugin throws the following error message:
“Sorry, the maximum number of possible submissions for this form has been reached. You are therefore unable to submit the form.”
However, you can also use your own custom error message. To do this, simply enter the desired text in the “Individual error message” option. If you leave this field blank, the standard error message is used.
Dynamically adjust the form when no more submissions are possible
The plugin also gives you the following option. The plugin can modify the form itself directly when the maximum allowed number of submissions is reached.
In the “Customize Form View” option, you can choose between
- Default setting “Do not change form”,
- Option “Remove Submitbutton” and
- Option “Do not show form”.
If you select the “Do not show form” option, the user will be redirected to the home page of your website and the error message will be thrown. If you have defined an individual error message, this message will be output, otherwise the standard message of the plugin. This setting is ignored when you view the form in a module or article.
Note: If you display the form on the home page of your website, this setting would start an infinite loop. Therefore this setting is ignored in this case.
If you select the “Remove submit button” option, all reset buttons and submit buttons in the form will be removed. In addition, the error message is output once at the position where the buttons are normally displayed.
An informative additional text
You can also display the error message text of the plug-in in the form using the “Print message in the form” option when the maximum number of possible transmissions has been reached. This is interesting, for example, if you have selected the values “Do not change form” in the “Customize form view” option.
In this way you give the user of your website the information that he can no longer submit this form even though it is displayed. The message is displayed at the top of the form.
Show number of remaining transfers in the form
If you activate the option “Show number of transmissions remaining”, the number of transmissions remaining is displayed above the form. By default, the text “Transfers remaining: xx” is used for this.
This text is appended to the description text in the form. If you don’t use a description in your form, the text will appear at the top of the form in place of the description text.
But you can also enter your own text. To do this, use the “Custom text” option and insert the placeholder %d at the point where the number of transmissions remaining should be inserted. The default text is Transmissions remaining: %d.
What happens if the options for a form are not set?
After you have installed and activated the plugin, no options are initially set for your forms. You must actively make these settings as described above if you want to limit the maximum number of transmissions.
If no transmission options are set for a form, this is completely unproblematic for the plugin. Forms without submission options can be submitted any number of times by a user.
The “Save result” option must be activated
In order for the plugin to work, the “Save result” option must be activated. The plugin uses the saved form data alone to check how often the form has already been submitted. Therefore, the plugin can only work if the submitted form data has been saved.
Visforms gives you the opportunity to decide for yourself whether you want to save submitted form data or not. Make sure this option is checked. To do this, go to the “Result” tab in the form configuration and make sure that the “Save result” option is activated.