The multi-page form
Note: These features are part of the Visforms Subscription and are not included in the free Visforms version.
For a better understanding, we recommend reading the documentation completely and using the
Section Introduction
to start.
Relationships explained in earlier sections of the documentation are not repeated here.
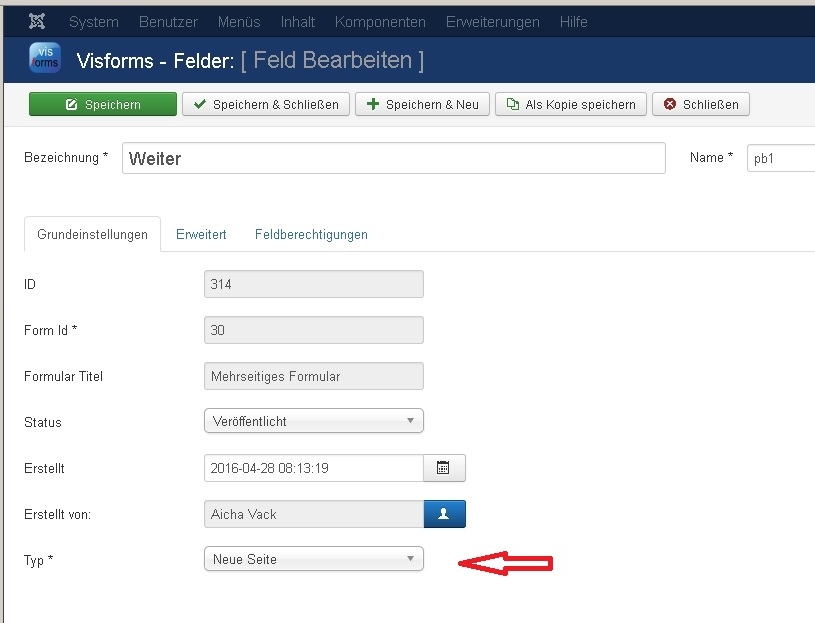
Multi-page forms are created when you insert a “New Page” type field
You can add as many pages as you like to each form. This is done simply by inserting a “New Page” type field in the form. Position the field in the order of fields where you want the page break to appear. The “Label” option of the “New Page” type field is used as the text of the button leading to the next page. Just as you know it from the submit button and reset button.

This adds Visforms automatically
Visforms automatically displays a “back button” from the 2nd page. If you have set the “Summary Page” option to “yes”, Visforms adds a summary page to the form. Visforms then automatically displays a “Check button” on the last form page with fields, which leads to the summary page. Visforms offers you numerous possibilities to configure the summary page and the new buttons. This is done in the form configuration under the “Advanced” tab.

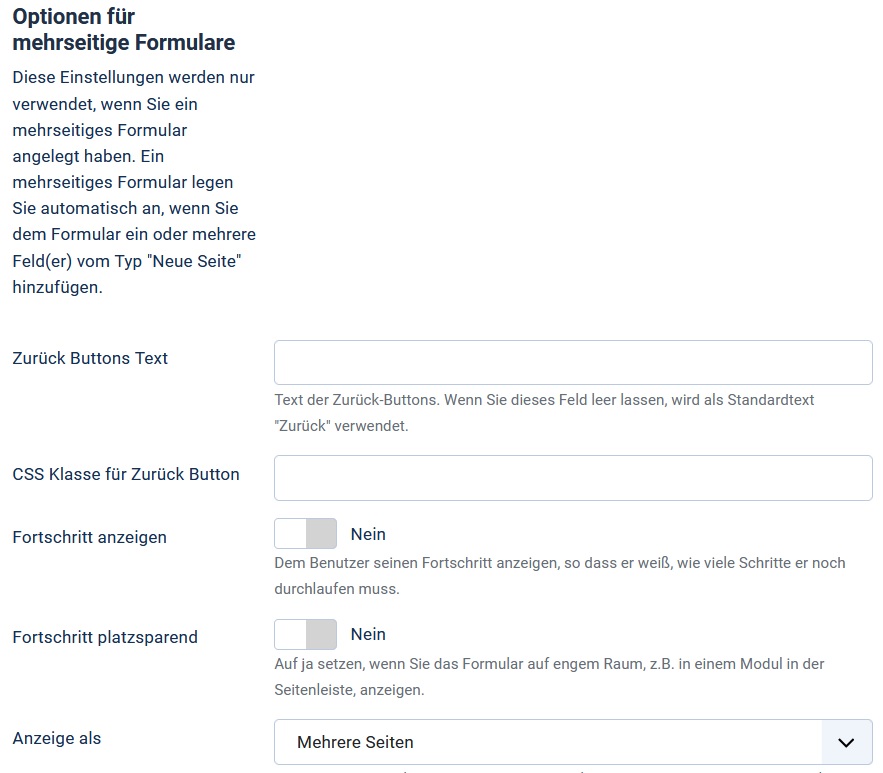
Options for multi-page forms
You can set your own text for the back buttons. If you leave this option blank, the default text “Back” is used.
Use the option “CSS class for back button” if an individual styling of the back button is needed.
You can determine whether the user can see their progress. For example, if you are displaying your form in a confined space in a module, you can “shorten” the text in the progress bar to save space. The “View As” option must be set to “Multiple Pages”. “Multiple pages” is the default value.
Space-saving display of the progress

An example form
An example of a multi-page form can be found here: Multi-page form.